
 Customer Projects
 Gallery
 Our Showroom
 Listed Buildings
How to measure for replacement windows
This guide shows you how to accurately measure for replacement windows. This guide is only applicable to cords & weights timber sash window, and should not be used for spring/spiral or non-timber windows. If you want to quickly take estimated measurements for the purpose of getting a quote from Sashed then follow this guide.
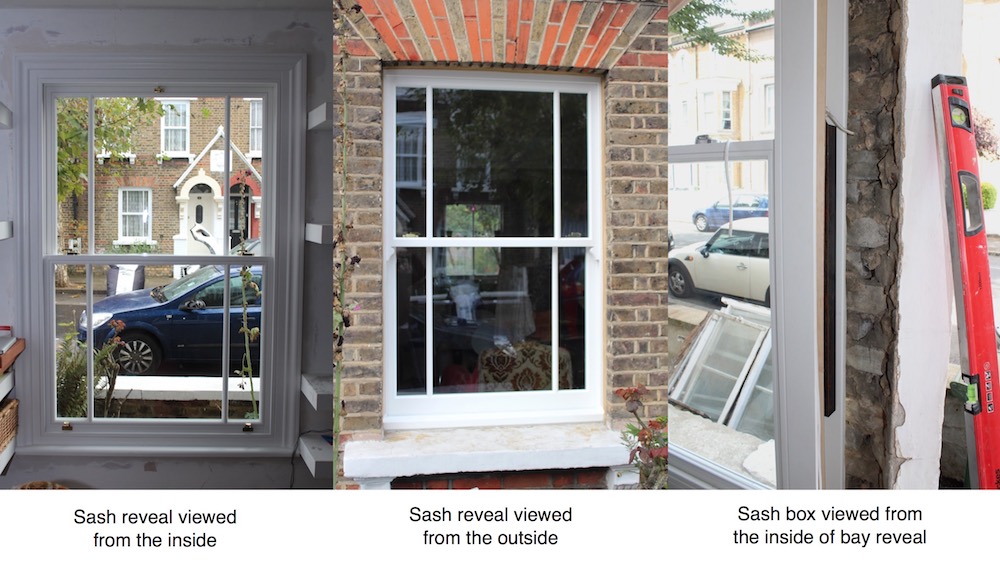
Measuring for Sash Windows with a sash reveal?
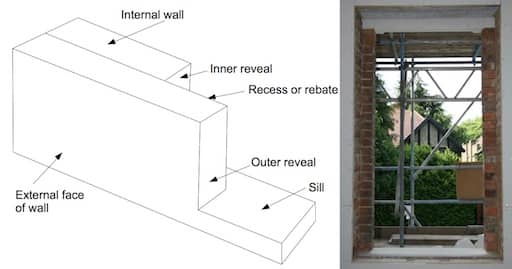
Typically a sliding sash window sits within a sash reveal (also known as a ‘check reveal’, ‘rebated reveal’ or ‘L-reveal’) in layman’s terms this means the external brickwork opening is smaller than the internal wall opening.
Using a rebated sash reveal allows the sash box to sit in a recess hiding both the front facing sides and top of the sash box so that only a small part of the window frame is visible or ‘facing’ on the outside.
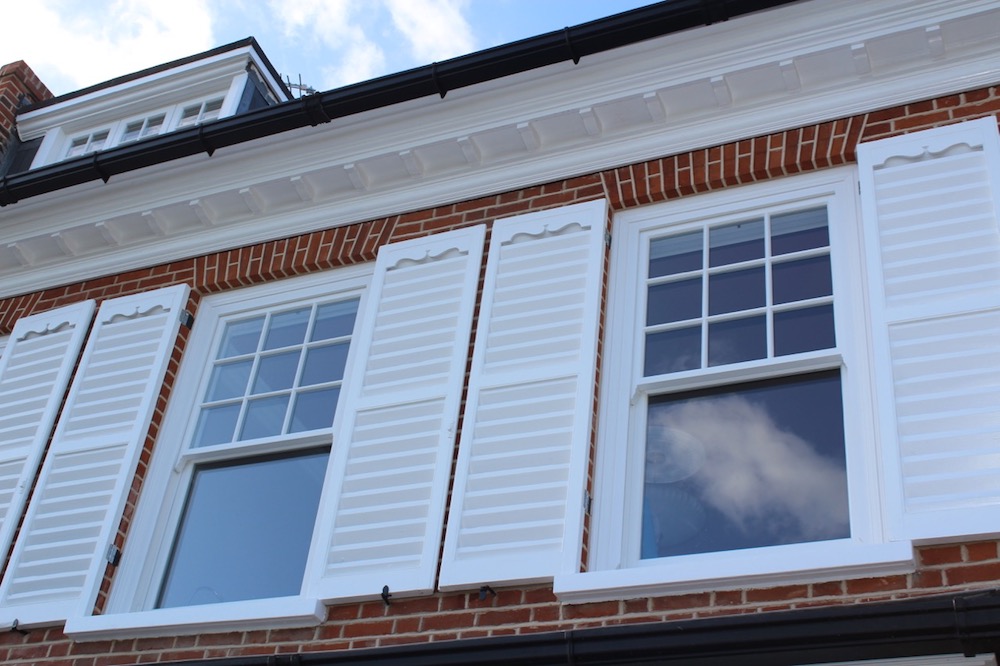
Measuring for sash Windows without sash reveal?
Sash windows can also be fitted in a flush opening without a sash reveal, this is usually known as ‘brick to brick fitting’. When fitted brick to brick the outside facing side of a sash box is usually ‘dressed’ which some trim (as shown in the picture to the right or above on a mobile device).
Sash window box/frame depths
The first step in measuring for a window replacement is to understand your existing windows and the aperture (opening) they are currently in.
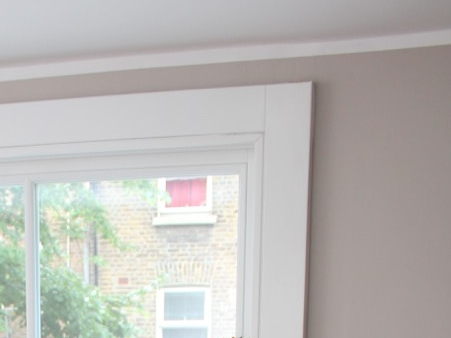
Equally important as the width or height of the new sash window is the depth of the sash box. The sash box needs to match the depth of the recess, so that it fits inside the sash reveal, is flush with the inside wall and does not protrude into the room. The depth of a sash reveal is usually between 145mm and 150mm in period properties.
The picture to the left (above on a mobile device) shows a 165mm thick sash box which is too deep for the 140mm reveal. Using a deeper frame means architrave will have to be packed out which can look very bulky and not in-keeping with period properties.
Sash window box/frame depths
Sashed offers a number of standardised sash profiles, to suit both period buildings and new build homes, each have different depths:
Profile 145: This sash box is 145mm deep and most suited to period properties.
Profile 150: This sash box is 150mm deep, is suited to both period properties and new builds.
Profile 165: This sash box is 165mm deep, is most suited to new builds but can also be used in period properties with deep reveals or with the use of reveal liners.
Profile 190: This sash box is 190mm deep, is only for use on sash windows with triple glazing is only suitable for new builds.
How to measure for replacement sliding sash windows
Measuring a sliding sash window correctly is actually quite straightforward, but please remember the old builder’s maxim ‘measure twice, cut once’. This step by step guide to measuring for new sash windows is good are for both profile 145 and profile 150, please contact us directly for steps to measure for profile 165 and profile 190.
Step 1:
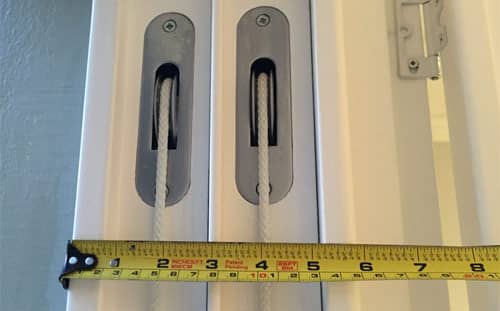
Measure the depth of the existing sash box. Measuring from the outside to the inside (see picture above).
Step 2:
Measure the width of the outside opening in three places; at the bottom, middle and top of the opening, the measurements should be the same but if they are notably different then check to see if there is a visible reason why; this could be because one or more bricks are uneven and the majority of the opening is the same width. You should use the measurement which is most likely to be the original outside width. If unsure, then use the measurement from the narrowest point.
Step 3:
Measure the height of the outside opening in three places; at the left and right side of the opening. If your measurements differ significantly check to see if there is visible uneven bricks or slight subsidence. You should use the measurement which is most likely to be the original outside opening height. If unsure, then use the measurement from the narrowest point.
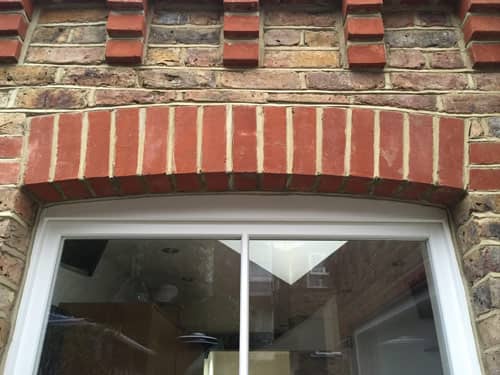
If your opening has a small arch or curve at the top of the window opening, then make sure the curve is less than 80mm. If the arch is more than 80mm (which is very unlikely) then the middle can be packed and filled with some timbers when fitting.
Step 4:
The frame width of our sash window profile 145 and 150 is 100mm at the and top, typically a sash box should ‘face’ or show 20mm at the top with the remainder of the box hidden behind the reveal. Take the measured outside opening height taken in step 3 and add 80mm, this is the exact height of your new sash box/window.
Some original recesses were built quite tight at the top, or the lintel may have ‘bowed’ over time, so adding 80mm could mean the sash box will not fit in the recess at the top. So make adjustments where necessary and if in doubt then add just 60mm to the outside height.
For example if your outside height measurement is 1920mm, add 80mm to get 2000mm; this is the height of the sash box (window) to order.
Step 5:
The frame width of our sash window profile 145 and 150 is also 100mm at the and sides, and like the top, the sides of a sash box should also ‘face’ (show) 20mm at either side with the remainder of the box hidden behind the reveal.
To calculate the width add 160mm to the outside opening width measurement taken in step 2, this is the exact width of your sash box (window).
For example if the outside width measurement is 1040mm, add 160mm to get 1200mm; this is the width of the sash box (window) to order.
How to measure for replacement casements windows and doors
Casement windows and doors are very simple to measure. There are usually no sash recesses for casement windows. Casement windows are fitted from the outside of a building, the inside opening will usually be a little smaller due to plaster build up.
Step 1:
Measure the width in three places brickwork to brickwork from the outside opening.
Step 2:
Measure the height in three places brickwork to brickwork from the outside opening.
Step 3:
Now take the smallest measurement of the three widths and heights and take off 10mm. This is the correct size you need to order. Any small gaps or spaces can be filled in with expanding foam, silicone, and pointing.
NOTE:
If a width or height is more than 1800mm, then you should add 15mm instead of 10mm.
 Request a quote or book a survey